Disclosure: Some links may be affiliate links. This means that I may earn a small commission if you decide to buy (at no additional cost to you)
Last Updated on August 24, 2025 by Erin Donahue
The rolling dunes of White Sands National Park offer photographers an otherworldly landscape. From pristine ripples in the sand to dramatic shadows cast by the sun, this unique destination presents endless opportunities for stunning imagery. Coincidentally, White Sands National Park is now my most visited U.S. National Park. It’s funny, I first traveled to New Mexico specifically to photograph the sunrise and sunset there, but have since returned numerous times as it’s only an hour away from my client, The Village of Ruidoso.
In this guide, I’ll share essential tips to help you capture the magic of the largest gypsum dune field in the world.
A Brief Introduction to White Sands National Park
Home to the world’s largest gypsum dune field, this natural wonder creates an otherworldly ecosystem where waves of pure white sand stretch as far as the eye can see. Unlike typical sand dunes made of quartz, these are composed of gypsum crystals, a mineral rarely found in sand form due to its water-soluble nature. The unique geological conditions of the Tularosa Basin allow these remarkable dunes to exist and persist.
The park’s history is as fascinating as its landscape. Originally protected as a National Monument in 1933, it achieved National Park status in December 2019, marking its significance in America’s natural heritage. The dunes exist in a complex ecosystem where wildlife has adapted uniquely to the white environment – some species have even evolved lighter colorations to blend with the sand.
Best Times to Visit White Sands National Park
The quality of light at White Sands can result in drastically different photos depending on the time of day.
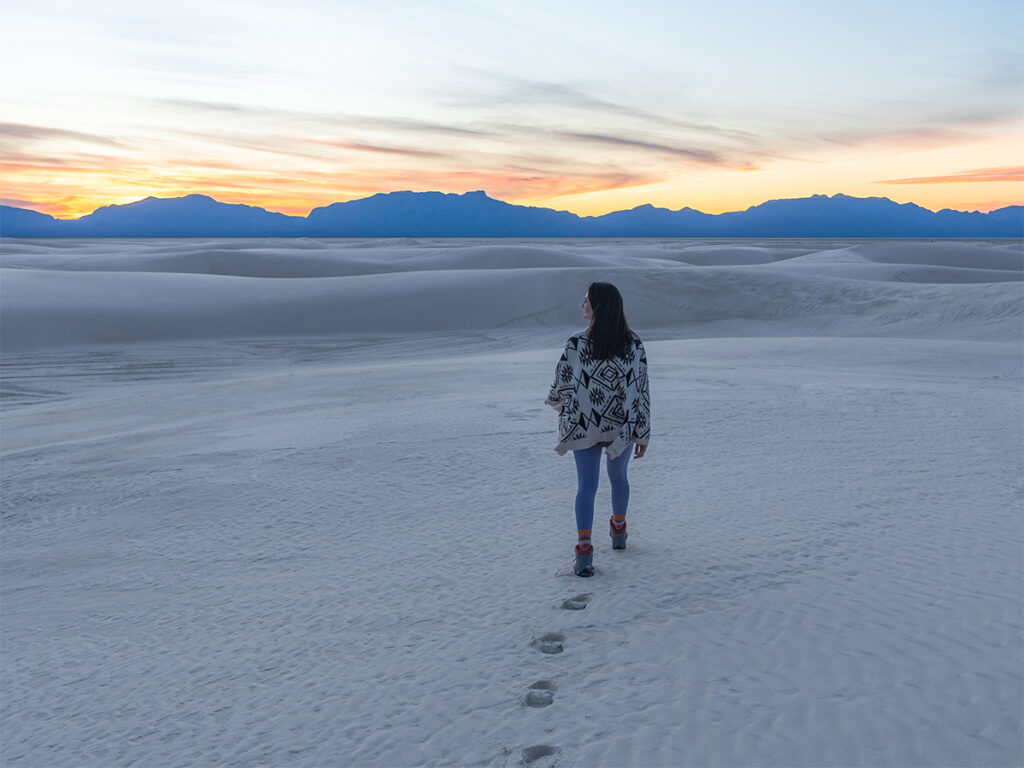
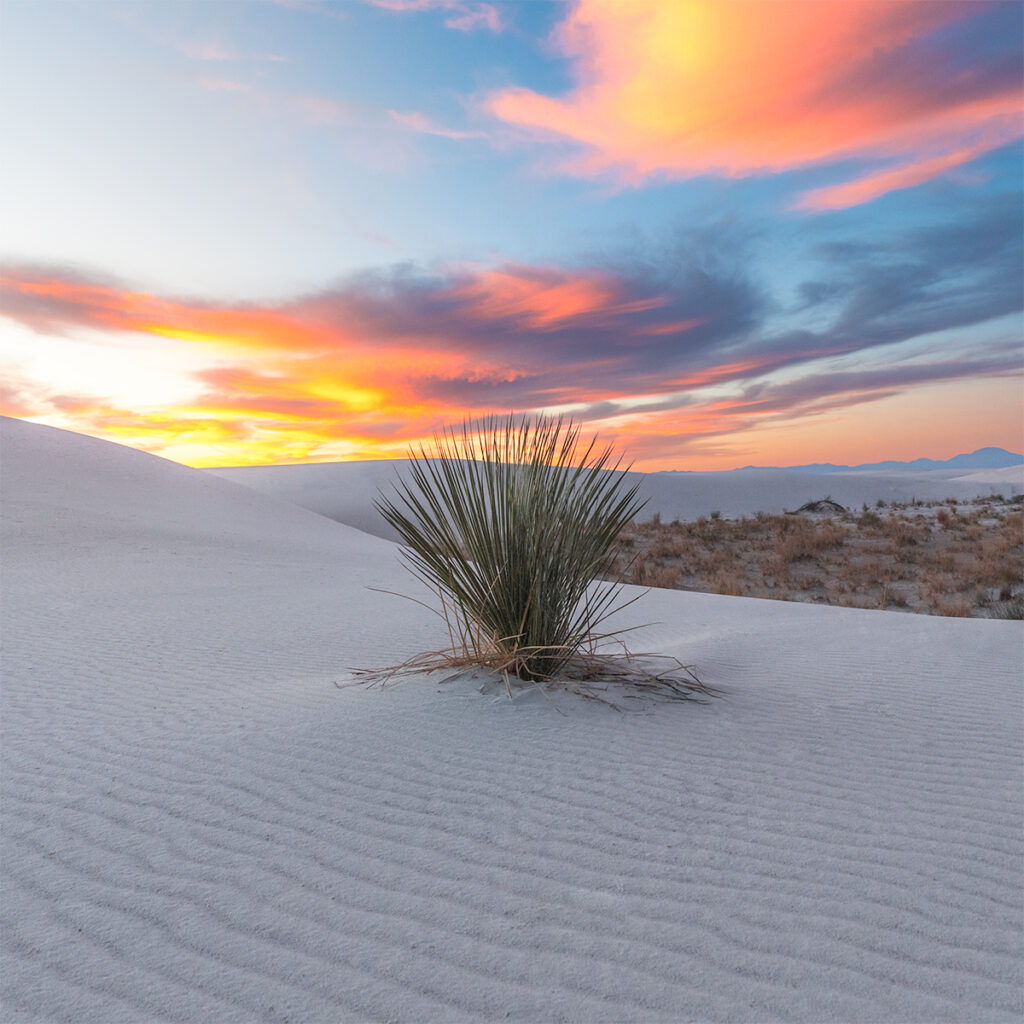
- Golden Hour & Blue Hour: Plan to arrive 1-2 hours before sunset or sunrise. The low-angle light creates dramatic shadows across the dunes and brings out their texture. The white gypsum sand takes on beautiful golden and blue hues during these times.
- Mid-Day: While challenging, mid-day offers unique opportunities for photographers who know how to work with high-contrast conditions. The stark white sand against blue skies can create striking minimalist compositions. Use a polarizing filter to deepen the sky’s blue and enhance cloud definition. Look for abstract patterns formed by harsh shadows, or experiment with black and white photography where the strong contrast becomes an artistic advantage.
- Season Selection: The Summer Monsoon Season (July-September) creates dramatic opportunities for storm photography, with lightning strikes illuminating the white dunes and massive thunderheads providing spectacular backdrops. However, photographing during monsoon season comes with serious risks: Lightning strikes are extremely dangerous in the open dunes
- Flash flooding can occur with little warning
- Storms can develop rapidly and unexpectedly
- Cell phone reception may be limited or nonexistent in parts of the park
- SAFETY WARNING: Storm photography at White Sands should only be attempted by experienced storm chasers who understand weather patterns and have appropriate safety equipment. Always check weather forecasts, inform others of your plans, and maintain multiple evacuation routes. If you hear thunder or see lightning, seek shelter immediately. No photograph is worth risking your life!!
Essential Camera Gear Photographing White Sands National Park
As always, you can find all the camera gear I travel with, but this is the general list of what you should keep in mind to bring.
- Camera Body: Any modern digital or mirrorless will work, even your camera phone. However, full-frame sensors offer advantages for handling dynamic range.
- Lenses:
- Mid-range zoom (24-70mm) for versatility photographing sweeping landscapes and dramatic perspectives.
- Telephoto (70-200mm+ ) for compressed dune compositions.
- Filters:
- Circular polarizer (CPL) to manage glare and enhance sky contrast.
- Neutral density (ND) for long exposures.
- Travel Tripod: an essential for travel gear. periodt.
- Cleaning Kit: The fine gypsum sand gets literally everywhere.
White Sands National Park Exposure Settings
- Base ISO: Keep it low (100-200) to maintain detail without noise
- Aperture: f/8 to f/11 for optimal landscape sharpness and depth of field
- Exposure Compensation: Start at +1 to +1.5 EV to account for the bright sand
Post-Processing Considerations
- White Balance: The white sand provides a perfect reference for accurate color
- Highlight Recovery: Shoot RAW to maintain detail in bright areas
- Local Adjustments: Use graduated filters for skies and dodge/burn to enhance dune textures
White Sands National Park Photography Tips Composition
- Leading Lines: Use ripples in the sand and dune crests to guide viewers through the frame
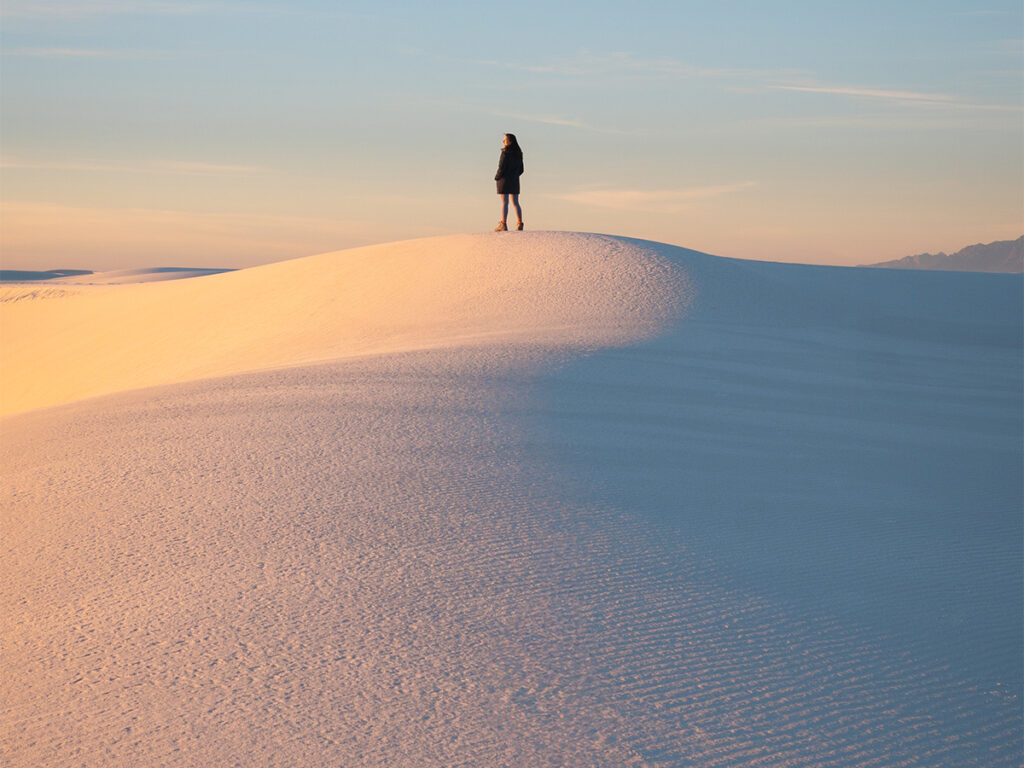
- Scale: Include people, plants, or other elements to convey the massive scale of the dunes
- Patterns: Look for repetitive patterns in the sand ripples
- Minimalism: Embrace negative space and simple compositions
- Foreground Interest: Use yucca plants, footprints, or interesting sand patterns
Practical Tips
- Park Access: Check park hours at NPS. Unlike many national parks, there is an open and closing time
- Navigation: Save GPS coordinates of your shooting locations and download an offline map
- Physical Preparation: Bring water, sun protection, and comfortable shoes
- Weather Watch: Monitor forecasts for clouds and wind conditions
- Sand Protection: Consider using a cover or plastic bags

What Makes White Sands National Park Special?
White Sands National Park is a photographer’s paradise that rewards preparation and patience. The key to successful images here lies in understanding the light, protecting your gear, and taking time to explore different perspectives. Whether you’re capturing vast landscapes or macro details, these gypsum dunes offer endless possibilities for unique and compelling photographs.
Remember to respect the fragile ecosystem, stay on marked trails when required, and pack out everything you bring in. With these tips and techniques, you’ll be well-prepared to capture the extraordinary beauty of this remarkable landscape. Happy snapping!
To keep up to date with everything I share, follow along on my social media and read up on what camera gear I use when I travel.
Great Post. Thanks for the information.
-Sunny
A.C.E. Expeditions