Disclosure: Some links may be affiliate links. This means that I may earn a small commission if you decide to buy (at no additional cost to you)
Last Updated on January 14, 2025 by Erin Donahue
Light painting photography is a sub-genre of long exposure techniques where photographers use an off-camera light source such as a flashlight, fiber optic, or even the flash on a cellphone to draw or alter an image. This adds an external element that helps elevate an image to truly make it unique, dare I say, artsy!
What Is Light Painting Photography?
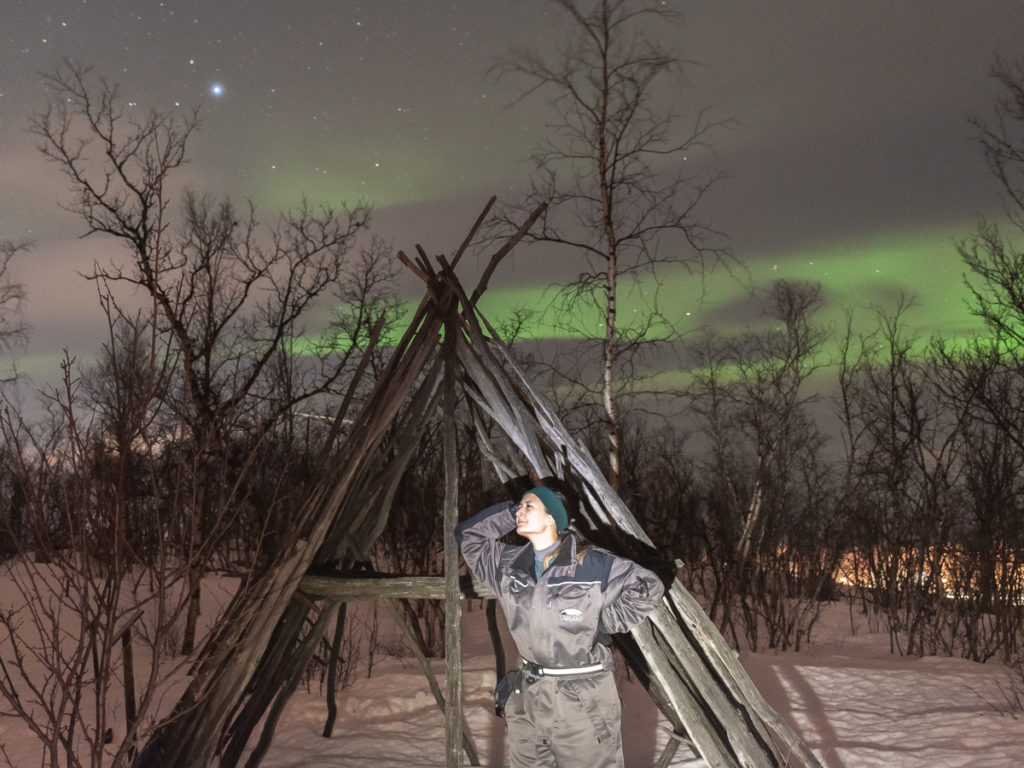
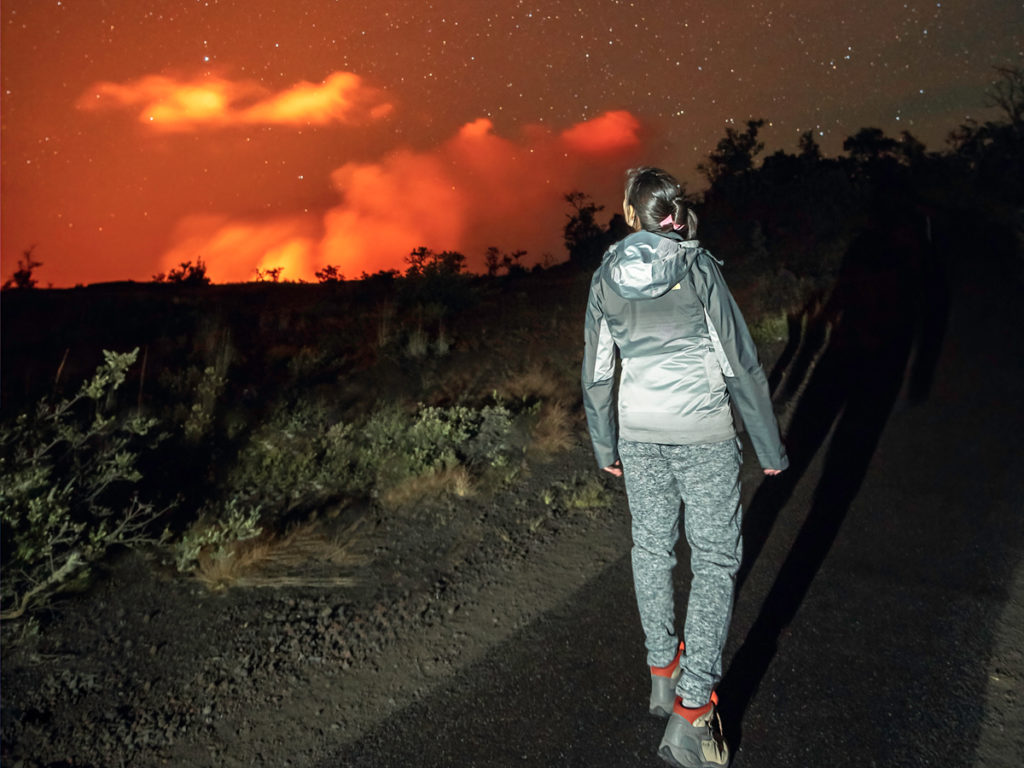
My first ever experience with light painting was in 2019 when I went to Abisko, Sweden in the Lapland region to chase after the Northern Lights. I was unfamiliar with the area and I didn’t want to take any chances missing the Northern Lights so I signed up for a photography tour. Since it was a dark sky zone there was no ambient light to illuminate the ground, so in order to match the foreground with the sky, light needed to be shined on it. Otherwise, we would have had to keep the shutter open for like 10 minutes just to get enough light in. Ain’t nobody got time for that! The instructor there showed me how to shine a flashlight briefly on a subject while the shutter of the camera was open. In this case, to get the foreground to be brighter, “paint” it with a bit of light.
A more nuanced definition of light painting photography is using an artificial light source to create streaks of light through dark spaces while the shutter is open. This can be done either indoors or outdoors. The creative possibilities are endless, and it’s super exciting to see what the camera captures once you get the hang of it! Since then, I’ve been able to experiment in different ways, and my most viral videos are always around light painting photography!
What Gear Do You Need?
Anytime you’re dealing with long-exposure photography you’ll need most of the equipment listed below in order to have full control over what you’re trying to create.
- Mirrorless/DSLR camera with manual setting capabilities
- Tripod is an absolute must. The shutter will be open for long periods of time, and any shake will blur the image.
- Shutter release remote or in-camera timer. When setting off the shutter it’s important not to touch the camera! A shutter release remote will allow you to press the shutter, without pressing the shutter. Personally, I hate carrying extra camera gear with me so I just set the timer to two seconds so that my hands are not on the camera when the long exposure starts.
- Light painting tools. I get my light tools like fiber optics from a company called Light Painting Brushes, but there are so many options you can use! Something as basic as a flashlight is all you really need to get started.
Types of Light Painting Photography
There are 3 basic Light Painting Photography Techniques: The On Camera Light Source, The Off Camera Light Source, and Kinetic Light Painting.
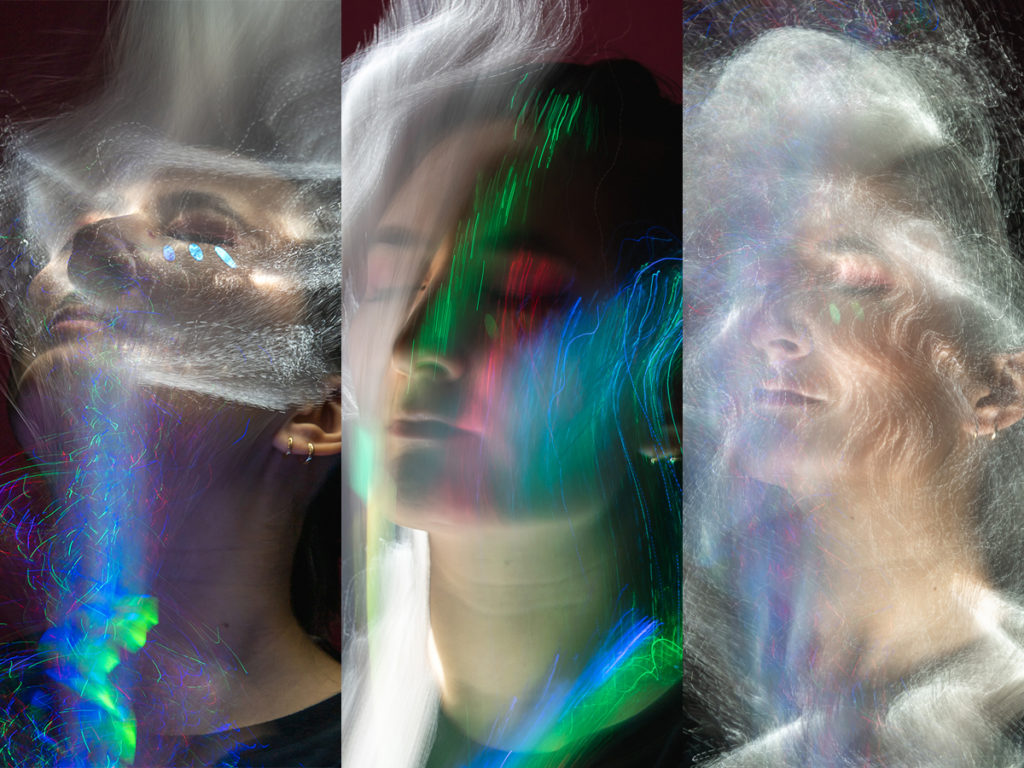
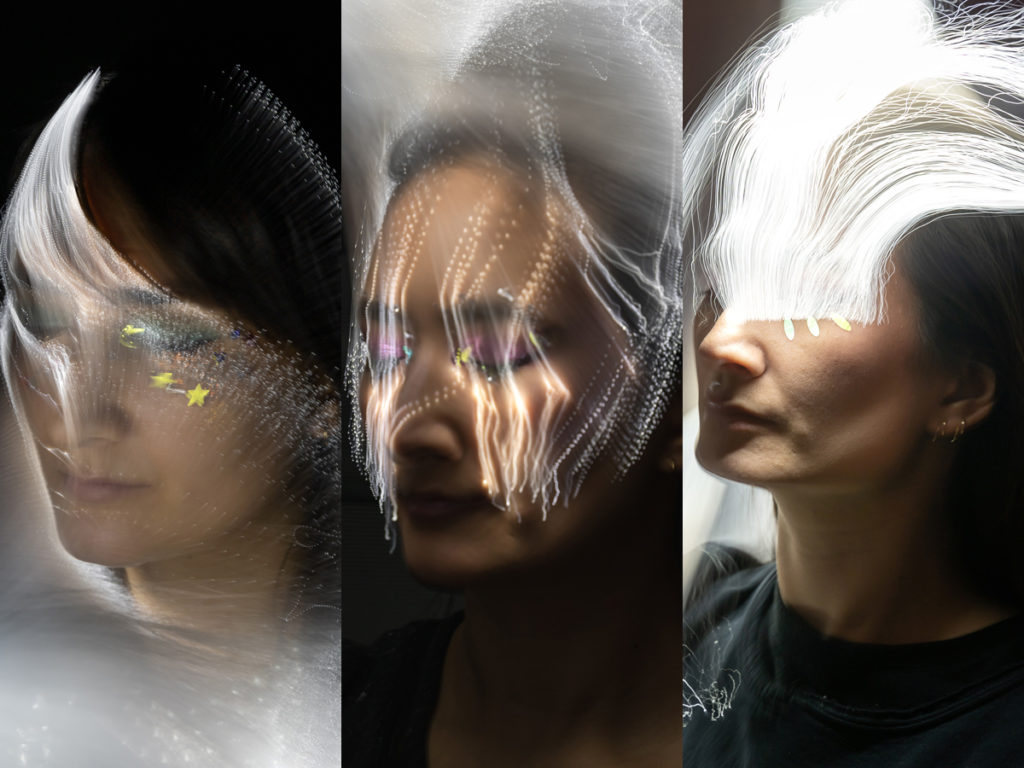
- On-Camera Light Source: This is what comes to mind with the term “light painting. This technique requires the artist to be in front of the camera during a long exposure and uses an illuminated light source to create color and design within the frame.
- Off-Camera Light Source: this is when the subject is illuminated by the light source outside the frame. Stand behind the camera during a long exposure and project light into the scene to create a design or illuminate the scene. This is great for lighting up the foreground to contrast with the background in low-light settings outdoors
- Kinetic Light Painting: where the light source stays stationary and the camera is the one that’s moved. This is a bit more advanced, but the results are always so trippy! An example of kinetic light painting is Zoom Burst. While the shutter is open, quickly twist your zoom lens. Be careful not to bump your camera when doing this, otherwise, you’ll get a different kind of blur.
What Camera Settings?
Let’s keep this concise, shooting in manual mode is a must, and do yourself a favor and shoot in RAW. If you’re still shooing in JPEG it’s time to cut that ish out and level up! Having complete control over all aspects of your image is crucial since there’s going to be a lot of trial and error. Editing in post-process plays a key role in bringing out the best final result. I don’t like to give exact settings anymore because it’s heavily dependent on your environment. I linked another video below of how I sat in the exact same spot, but at different settings. Variables such as ambient light, distance, and focal length all determine how to adjust your exposure.
- If you’re indoors start your shutter speed at a minimum of one second, and outdoors way longer, potentially even BULB.
- The aperture should be anywhere from f/5.6-10 to get all the details sharp.
- Ideally, ISO should be as low as possible around 100, but you can push it up anywhere to 400-800 if necessary.
- White balance on auto. I almost never change WB since it’s easy to adjust in post-processing.
- Switch to manual focus. The last thing you want is your camera taking forever trying to focus on the subject. It will most likely be impossible anyway. If you’re a Sony user like me, the focus peaking function is your best friend!
Can You Do Light Painting Photography On Your Phone?
Technically, yes. However, it sucks. Camera phones don’t have the native ability to keep the shutter open for long periods (yet), so getting an additional app is a must. I tested out the slow shutter cam app and hated it LOL. The light was overexposed even when I tried to adjust the settings, and overall I just didn’t feel like I had any control with a phone. Of course, I also made a video using the phone too, but that final picture is from my camera. Usually, I’m more than happy to share the results, but for fear of getting shafted on social media, I couldn’t bring myself to show the actual picture taken from the phone.
5 Easy Ideas To Try With Light Painting
- Write something in the air
- Fiber optic portrait
- Draw an electric light orb
- Draw a halo on your subject
- Accent some drama on still-life subjects like flowers or fruit
Watch On YouTube
To keep up to date with everything I share, follow along on my social media and read up on what camera gear I use when I photograph long exposure techniques like light painting.
________________________________________________________________________________________________________________
Pin this post!
Comments +