Disclosure: Some links may be affiliate links. This means that I may earn a small commission if you decide to buy (at no additional cost to you)
Last Updated on April 29, 2026 by Erin Donahue


A photo that moves. A video that stays still. Are cinemagraph’s making a comeback? This isn’t a new concept; they peaked on Instagram around 2014–2018, when the platform still prioritized photos. With the explosion of TikTok around 2020-2021, followed by Instagram trying to compete with Reels, video took over social media, and the creative format disappeared. Recently, though, I’ve been noticing “video postcards” rising as a way for photographers and cinematographers to blend the mediums. Quite simply, they’re nothing more than looping a static video, which my archive is full of. That got me thinking, “Why not start posting cinemagraphs again?”
A cinemagraph is a hybrid of a still photo and a video where most of the scene stays frozen while one isolated element loops continuously. The format originated in 2011 when photographers Jamie Beck and Kevin Burg started publishing “animated photographs” from New York Fashion Week. It spread quickly during a time when Instagram was solely for photo-sharing. I predict cinemagraphs will become relevant again because it’ll be a way for creators to have their work stand out among the competition. Read on for my full workflow.
How Do You Shoot a Cinemagraph?
Anything can be a cinemagraph with a little bit of pre-production planning. No dedicated app, fancy camera, or advanced editing skills required. If you already know your way around Photoshop, specifically layer masks, you can make your first cinemagraph today.
If you’re not thinking ahead and just recording a scene in front of you, something to be conscious of is clean lines. They will make your life infinitely easier. Whatever you want to be in the loop should not overlap with anything else in the scene. You’re more than welcome to if you want the challenge, but those create masking problems that are time-consuming to edit in post.
The entire effect depends on a locked frame, so set your camera or phone on a tripod and record a video for as long as you need. I typically record a scene between 10 and 30 seconds so that there’s enough footage to isolate the motion.
How Do You Make a Cinemagraph in Photoshop?
There are a few ways to make a cinemagraph, but I’ve found this to be the easiest. Here is the complete step-by-step workflow on how to make a cinemagraph in Photoshop.
Step 1: Import Your Video into Photoshop
Open your video file directly in Photoshop. When it loads, Photoshop automatically opens the Timeline panel at the bottom of the screen.
Step 2: Convert the Video to a Smart Object
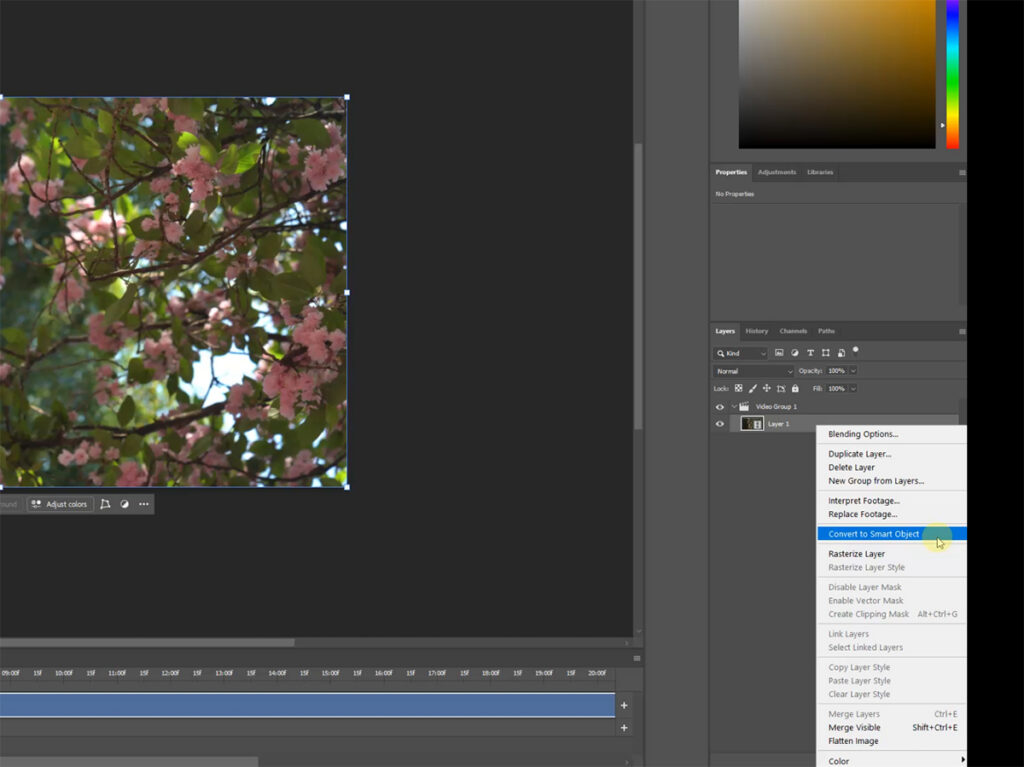
Before you edit anything, right-click your video layer and select ‘Convert to Smart Object’. If you skip this and go straight into editing in Camera Raw, your color and exposure adjustments only apply to a single frame, not the entire clip. The result is a mismatch between your still frame and the video loop. Converting to a Smart Object first means any edits you make apply uniformly to every frame.
Step 3: Edit Your Footage in Camera Raw
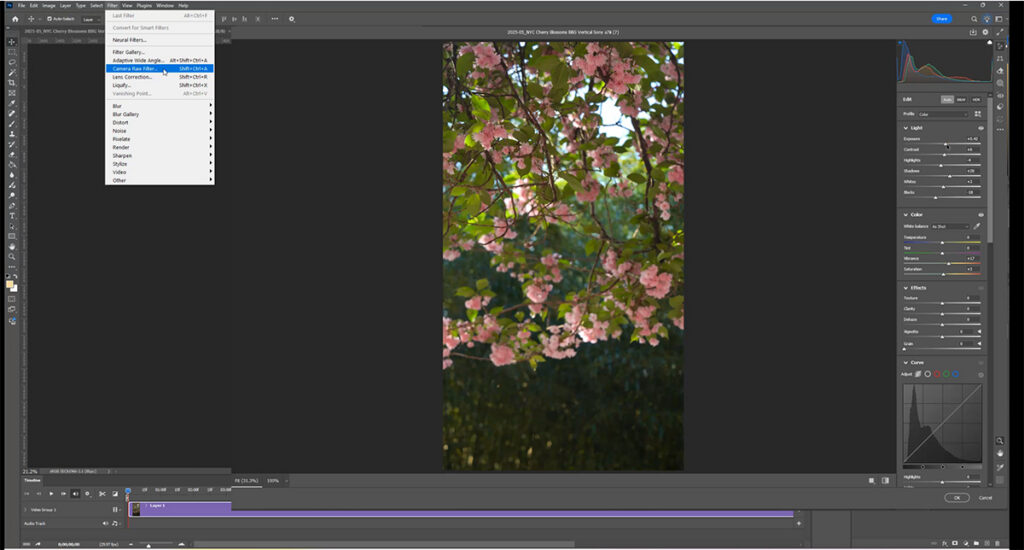
With the Smart Object selected, go to Filter > Camera Raw. The interface works almost identically to Lightroom, so if you already edit photos there, this will feel familiar. Adjust whatever you need to get the look you want. When you hit OK, those changes apply to the entire video clip.
Step 4: Freeze Your Still Frame
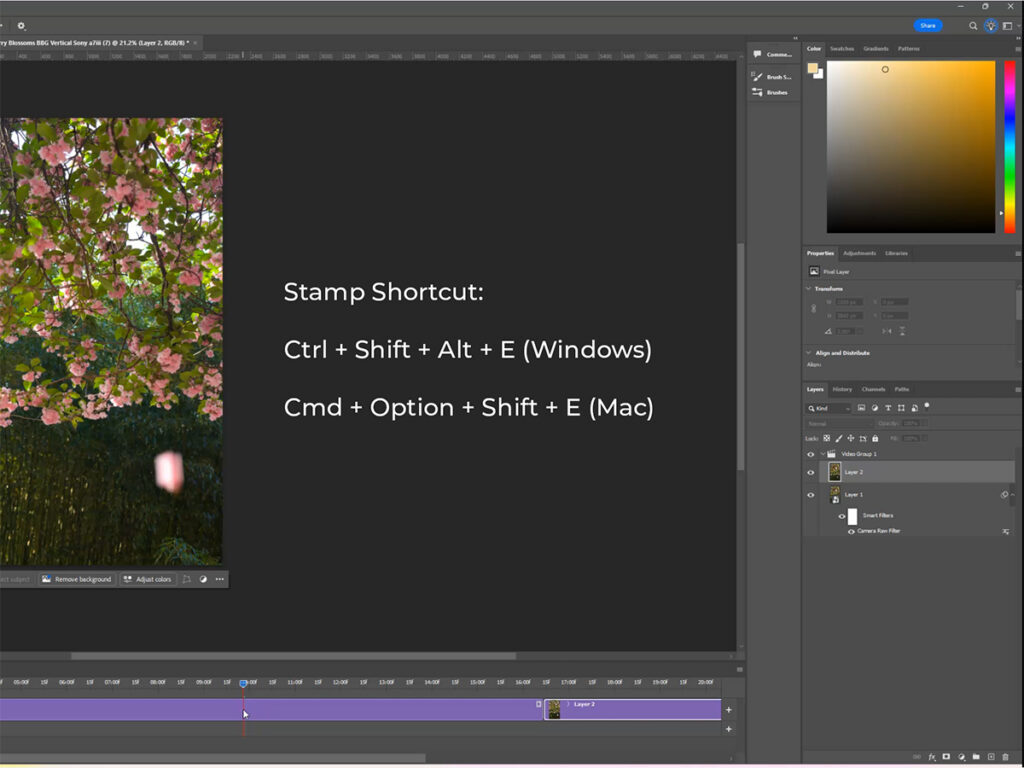
Scrub through the video timeline and find the frame you want as your static image. Make sure your topmost layer is selected, then use the Stamp Visible shortcut to flatten all visible layers into a single new layer at the top of the stack. This becomes the “photo” layer in your cinemagraph.
- Mac: Command + Option + Shift + E
- PC: Ctrl + Alt + Shift + E
If you’re going for a very specific look, photo-wise, you can also take a picture in addition to recording a video, but I’ve found it to be frustrating to reconcile the photo and video together, because the aspect ratio seems to mess up the alignment. I thought it would be straightforward, but it’s highly dependent on the scene, so that’s why I’m just recommending recording a video and freeze-framing somewhere in there. It’s simply less work.
Step 5: Stack the Layers
After freeze-framing, you’ll see both the still image and the video clip appear on the same timeline. Drag the still photo layer above the video layer in the Layers panel. Now the static image sits on top, completely covering the video beneath it.
Step 6: Add a Layer Mask and Paint Your Loop
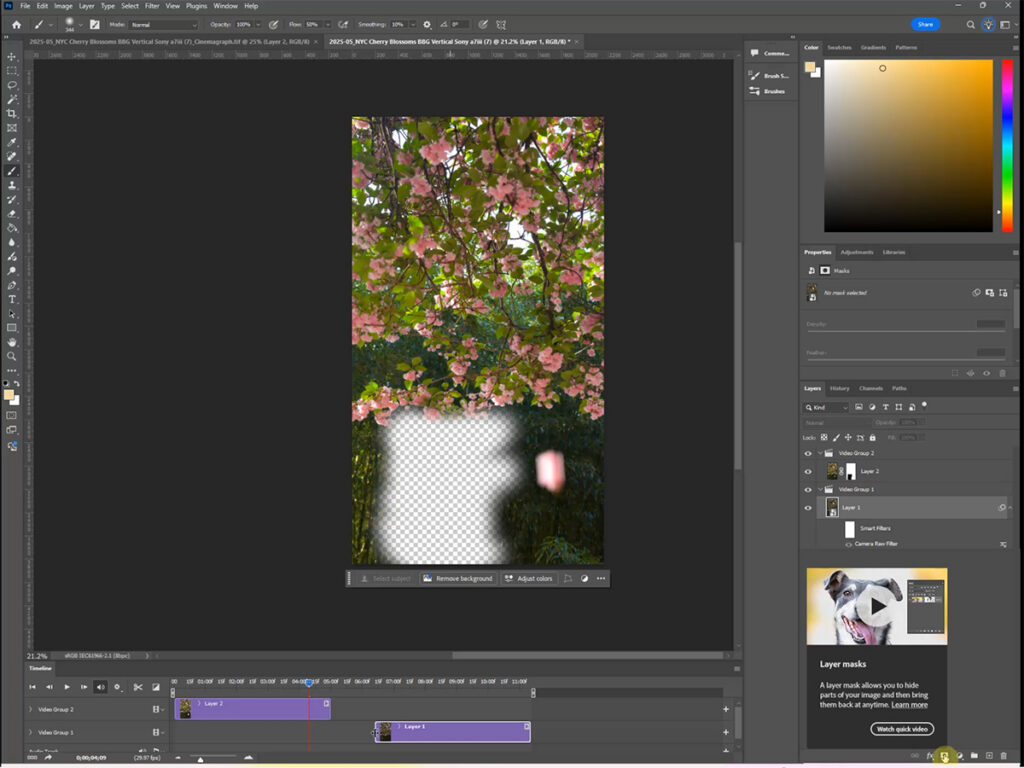
Add a layer mask to the still photo layer. The rule to remember: white shows, black hides. Select the Brush tool, set your color to black, and paint directly over the area where you want the video motion to show through. As you paint, you reveal the moving video layer beneath. If you painted too far, switch your brush to white and paint back to restore the still image.
Step 7: Export a Cinemagraph for Social Media
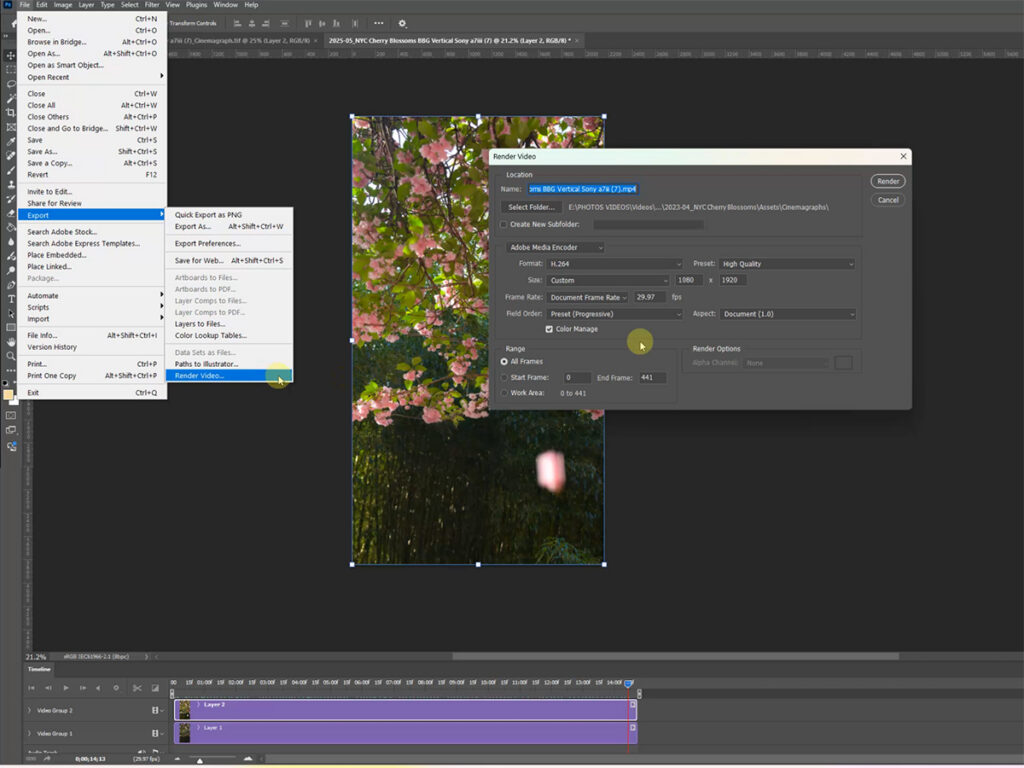
When you’re finished, go to File > Export > Render Video to export as an MP4. MP4 works across Instagram, TikTok, and most other platforms. From here, you can either bring it into Adobe Premiere Pro to resize or further refine the loop, but if you’re happy with the result, then it’s ready to post!
If you need a GIF for web or email use, go to File > Export > Save for Web and select GIF with looping set to Forever. For social media, though, stick with MP4. GIFs compress color and tend to look muddy on mobile screens.
FAQs about how to make a cinemagraph in Photoshop
Can You Make a Cinemagraph Without Premiere Pro?
Yes. Photoshop can handle the entire workflow on its own. Premiere Pro is only useful if you need to resize the output or want more precise control over the loop timing.
Can You Make a Cinemagraph on a Phone?
Yes, the simplest way is through the iPhone’s Live Photo feature. Convert a Live Photo to a loop directly in your camera roll with no editing required. There are also dedicated apps like Flixel’s Cinemagraph Pro that handle the full masking process on mobile.
What Is the Difference Between a Cinemagraph and a GIF?
A GIF is a file format. A cinemagraph is a creative technique. Cinemagraphs are defined by the intentional contrast between a completely frozen scene and one isolated element of motion. They’re more commonly exported as MP4s, but can also be exported as a GIF.
Comments +